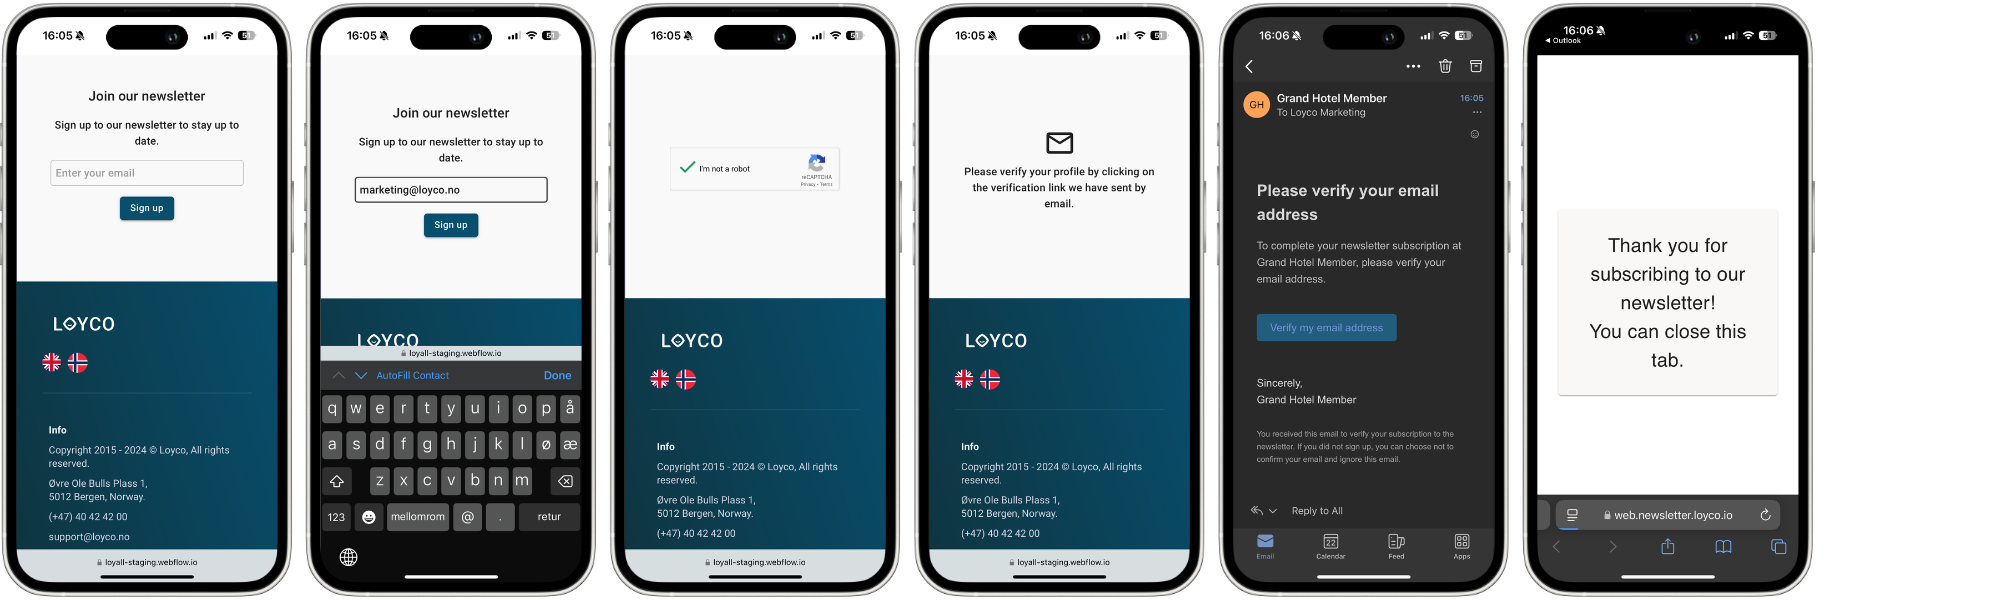
Setup newsletter sign-up
Guide to integrating the newsletter sign-up module into your website, including requesting a Newsletter ID, embedding scripts, customizing styling, and verifying functionality.
The Newsletter Sign-Up Module allows you to effortlessly collect subscribers from your website. All new sign-ups are automatically added to your dashboard, organized with your preferred tags for easy management.
Step 1: Request unique "Newsletter ID"
- Please complete the form to request your unique “Newsletter ID” and specify the website where you plan to embed the script.
- We will verify the domain using reCAPTCHA for added security.
- Open form
Step 2: Add “Newsletter ID” to <head> Script and paste to header of website
- Insert your “Newsletter ID” into the script and place it in the <head> section of your website.
- Replace the “Newsletter ID” (bolded below) with your unique ID.
- The placeholder ID currently points to Loyco’s demo loyalty program: Grand Hotel Member.
- Update optional styling
- Choose button color: Any hex code
- Choose button text color: Any hex code
- Choose alignment: "center", "right" or "left"
<!-- Include the widget script -->

<script src="[https://static.newsletter.loyco.io/newsletterWidget.js](https://static.newsletter.loyco.io/newsletterWidget.js)" defer></script>

<script type="text/javascript">

    window.addEventListener('DOMContentLoaded', function() {

        window.CreateNewsletterWidget({

            newsletterID: "**0123c5b7-2299-7577-9f68-b7c212a108a6a3d**"

        });

    });

</script>

<!-- Define CSS variables for text color and button text color -->

<style>

    :root {

        --textColor: #**023952**; /\* Default text color \*/

        --buttonTextColor: #**ffffff**; /\* Default button text color \*/

    }

    /\* Center the .newsletterWidget inside the container \*/

    .container {

        display: flex;

        justify-content: center;

        align-items: center;

        text-align: center;

    }

    /\* Ensure text color is applied to all content within .newsletterWidget \*/

    .newsletterWidget \* {

        color: var(--textColor) !important; /\* Force text color \*/

    }

    /\* Change the color of the button inside the widget \*/

    .newsletterWidget button {

        background-color: #**023952** !important; /\* Apply button background color \*/

        color: var(--buttonTextColor) !important; /\* Apply button text color \*/

    }

    /\*  styling for reCAPTCHA container \*/

    .newsletterWidget .g-recaptcha {

            transform: scale(var(--recaptchaScale)) !important;

            transform-origin: center !important;

            margin-top: var(--recaptchaMarginTop) !important;

            margin-left: auto !important;

            margin-right: auto !important;

            display: inline-block !important;

        }

        /\* Adjust the container height to accommodate scaled reCAPTCHA \*/

        .newsletterWidget .g-recaptcha-container {

            min-height: calc(78px \* var(--recaptchaScale)) !important;

            width: 100% !important;

            display: flex !important;

            justify-content: center !important;

            align-items: center !important;

        }

</style>
Step 3: Paste the <body> script into your desired section of the website.
- Choose the Placement: You can put the sign-up form in places like:
- Homepage: Near the top for more visibility.
- Footer: So it shows on every page.
- Specific Pages: Like your “Contact Us” or blog page.
- Multiple Locations: You can add the form to more than one place. Just paste the script wherever you want it to show, such as in a <div> or <section> on different pages or sections.
Step 4: Verify functionality and design
- You can test the newsletter sign-up form on your own website using the example script connected to the Loyco demo.
- Once you receive your unique Newsletter ID, you can easily update the script to switch from testing to live mode.
- To see how the form looks in action, visit our demo site here.